Capturing website screenshots periodically is essential for visual regression testing, monitoring competitor price changes, or archiving website history. Agenty’s Change Detection Agent not only monitors text changes but also includes full page screenshot for a URL.
This guide will show you how to automatically take screenshots at any interval you choose.
In today’s online world, keeping an eye on website changes is essential for businesses and individuals alike. Whether it’s monitoring competitors’ updates, tracking industry trends, or ensuring your own website’s integrity, having a reliable tool to capture website screenshots can be invaluable.
Capture screenshot
To start, you need to create an agent that is configured to render the page and save the screenshot automatically.
- Login to your Agenty account
- Create a new Change detection agent
- Enter the URL on input and click on Run
- Enable Screenshots option given in the config tab.
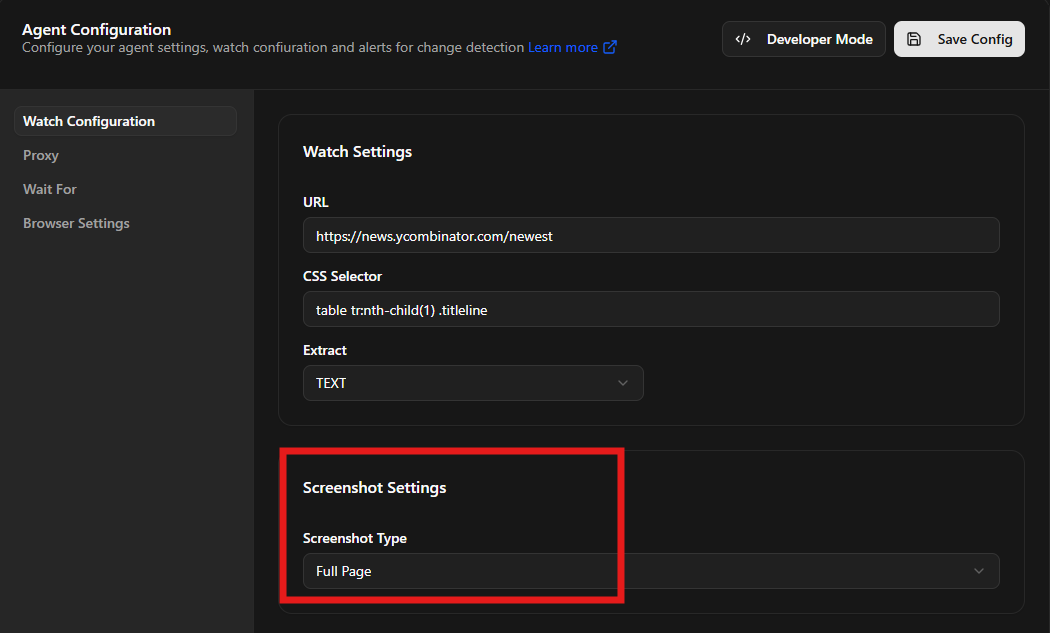
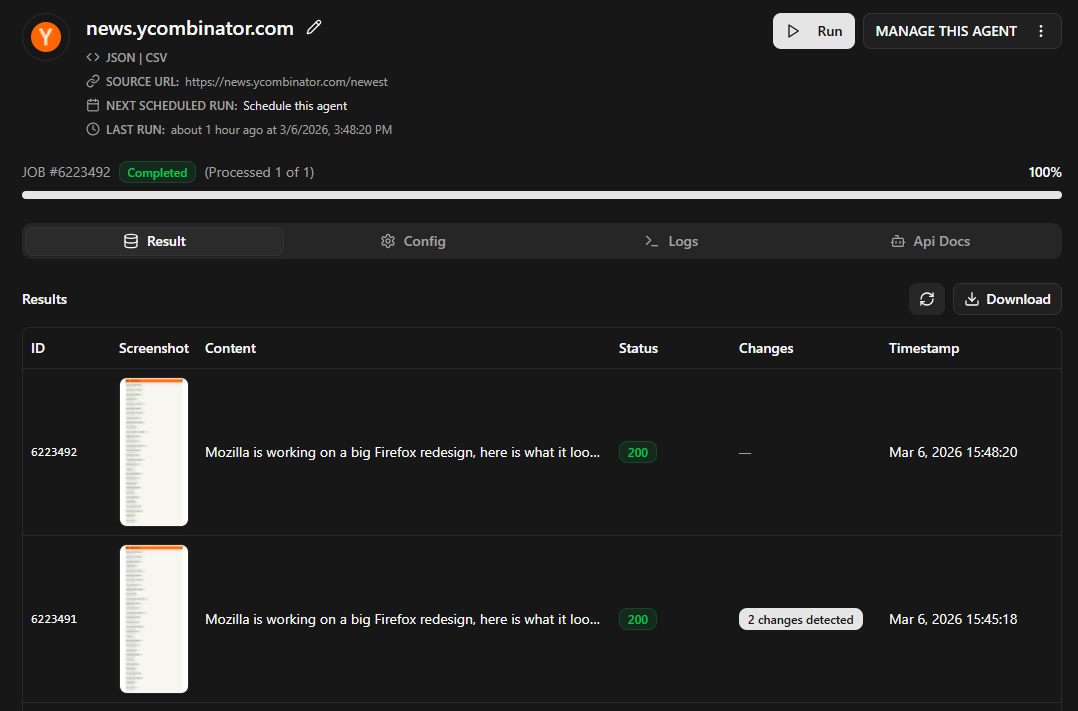
Click the Save and Run button to verify that the agent successfully captures the screenshot. You can view the output in the “Result” tab once the job is completed.
Scheduled screenshot
Once your agent is working, you can automate it to run without manual intervention. This is how you set up a daily screenshot or an hourly capture.
- Click on the schedule options
- Select the hourly, daily or weekly schedule
- Click on save to schedule this automated screenshot agent
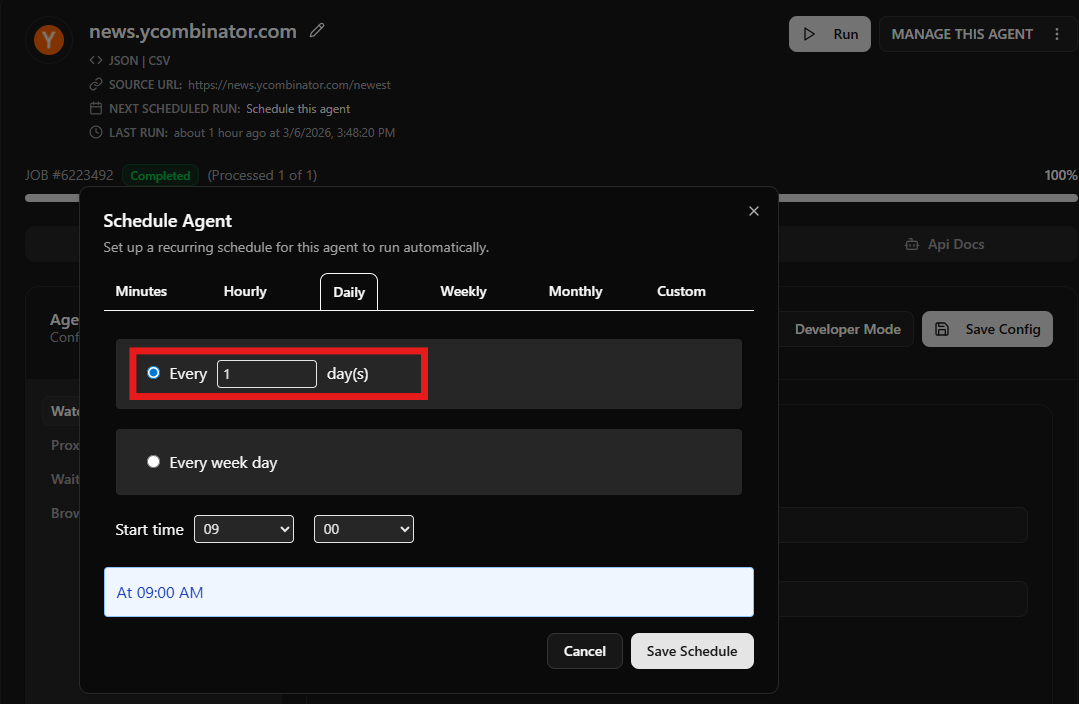
For example, I have set this agent to run every day. You can adjust the schedule depending on your requirement and pricing plan (Remember, the more frequently you run > higher the page’s credit).
For example, if you are running it every hour with a single URL. It will consume 24 pages of credit in a day.
Download screenshots
There are two ways to download screenshots using Agenty. If you have an agent running on a schedule, you can send requests to the Agenty API to fetch the latest screenshot results and download them to your local directory. Alternatively, if you are a developer integrating screenshots into your application, you can use the Agenty /screenshots API to capture live website screenshots programmatically.
Script to Download All Screenshots Locally
You can use this Node.js script to automatically fetch your results from Agenty and download every url screenshot file to a local directory on your computer.
const fs = require('fs');
const path = require('path');

// Configuration
const API_KEY = 'YOUR_API_KEY';
const AGENT_ID = 'YOUR_AGENT_ID';
const DOWNLOAD_DIR = './my_screenshots';

async function downloadScreenshots() {
    // Create directory if it doesn't exist
    if (!fs.existsSync(DOWNLOAD_DIR)) {
        fs.mkdirSync(DOWNLOAD_DIR);
    }

    try {
        console.log("Fetching results from Agenty...");

        // Fetch the latest results (adjust limit as needed)
        const response = await fetch(`https://api.agenty.com/v2/results/${AGENT_ID}?limit=100`, {
            headers: { 'Authorization': `Bearer: ${API_KEY}` }
        });

        const data = await response.json();
        const results = data.results || [];

        for (const [index, row] of results.entries()) {
            // Ensure the key name matches your field name (e.g., full_screenshot)
            const imageUrl = row.screenshot;

            if (imageUrl) {
                const timestamp = new Date().getTime();
                const fileName = `screenshot_${index}_${timestamp}.png`;
                const filePath = path.join(DOWNLOAD_DIR, fileName);

                const imgResponse = await fetch(imageUrl);
                const buffer = await imgResponse.arrayBuffer();

                fs.writeFileSync(filePath, Buffer.from(buffer));
                console.log(`Saved: ${fileName}`);
            }
        }
        console.log("Download complete!");
    } catch (error) {
        console.error("Error:", error);
    }
}

downloadScreenshots();
Capture screenshot instantly
Developers can trigger the screenshot agent programmatically using the Agenty REST API. This is useful for integrating screenshot captures into your own workflow or CI/CD pipeline.
POST: https://api.agenty.ai/screenshot

{
  "url": "https://news.ycombinator.com/newest",
  "anonymous": {
    "proxy": true
  },
  "options": {
    "fullPage": true,
    "type": "png"
  }
}