Playwright is a tool that allows you to automate web browsers like Chromium and Firefox directly from your VS code project. It offers a clean and user-friendly API for creating automated browser tests and scripts using Typescript or JavaScript.
Follow these steps to install Playwright :
Step 1: Install Node.js and NPM in your system
Playwright needs Node.js to work. If you haven’t installed Node.js yet, download it from the official Node.js website. Installing Node.js will also install NPM (Node Package Manager), which is used to install Playwright.
To check if Node.js and NPM are installed in your local system, open your terminal and run these commands to see their versions:
node -v
//v20.13.1
npm -v
//10.5.2

Step 2: Install Playwright
Run the following command to initialize a Playwright setup:
npm init playwright@latest
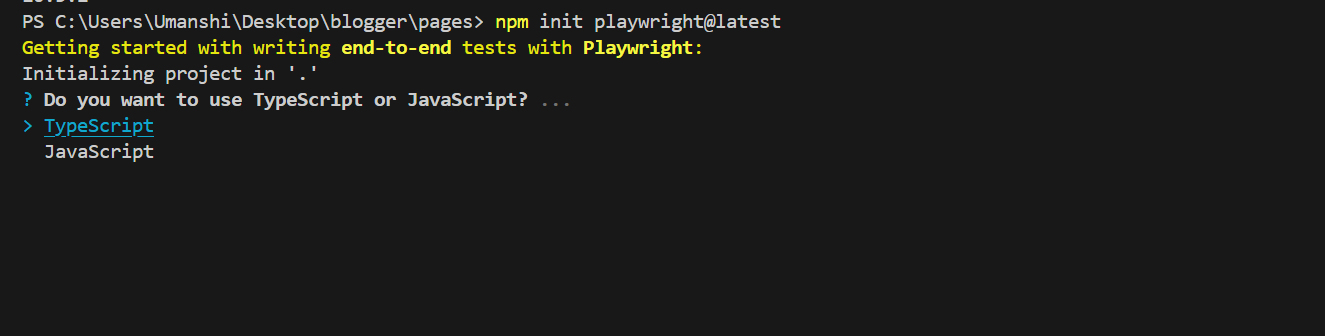
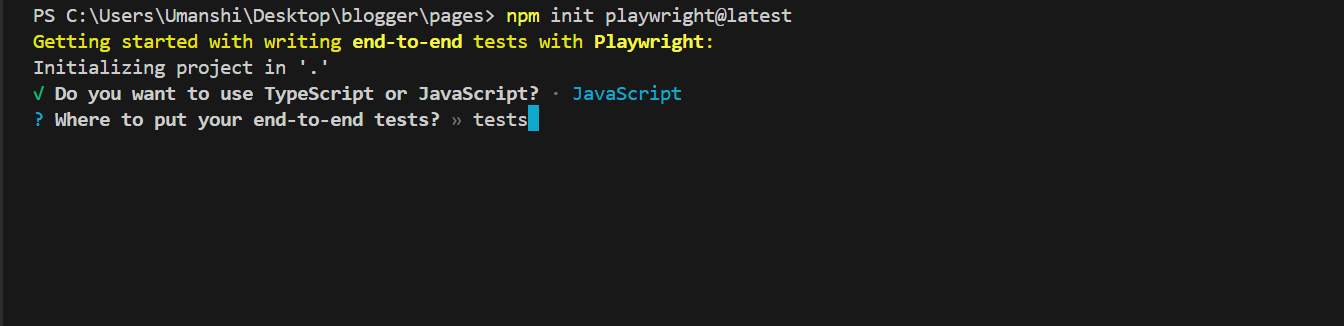
Step 3: Configure Installation Options
During installation, you’ll be prompted to select configurations. Here’s what each option does:
-
Choose language: Select TypeScript or JavaScript (default is TypeScript).
-
Tests folder: Name the tests folder (default is
tests, ore2eif you already have atestsfolder). -
CI integration: Optionally, add a GitHub Actions workflow for running tests on Continuous Integration (CI).
-
Install browsers: Playwright will download the necessary browsers (default is yes).
Step 4: What’s Installed
Playwright will download required browsers and create the following files:
-
playwright.config.ts: Configuration file for Playwright, where you can customize settings like browser selection, test timeouts, etc. -
package.jsonandpackage-lock.json: Project dependencies. -
tests/: Folder with example tests to help you get started. -
tests-examples/: Contains more detailed example tests, likescreenshot.spec.js, for additional guidance.
Step 5: Running the screenshot Test
Click on the screenshot using playwright to learn more.
import {test} from '@playwright/test';

test.only('Capture website screenshot', async() => {
  const browser = await test.chromium.launch({ headless: false });
  const context = await browser.newContext({
    viewport: { width: 1280, height: 720 },
  });
  const page = await context.newPage();
  await page.goto("https://scrapingsandbox.com/");
  await page.screenshot({ path: "products.png", fullPage: true });
  await browser.close();
});
To run tests, use the command:
npx playwright test screenshot.spec.js
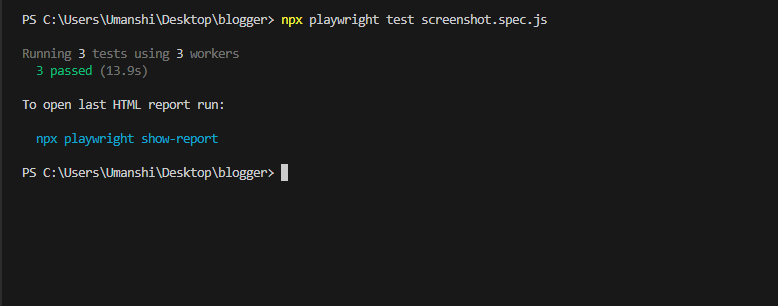
By default, tests run on all three browsers (Chromium, Firefox, and WebKit) in headless mode (no browser window opens). The configuration, including the number of workers and browser options, can be adjusted in playwright.config.ts. Test results and logs will appear in the terminal.
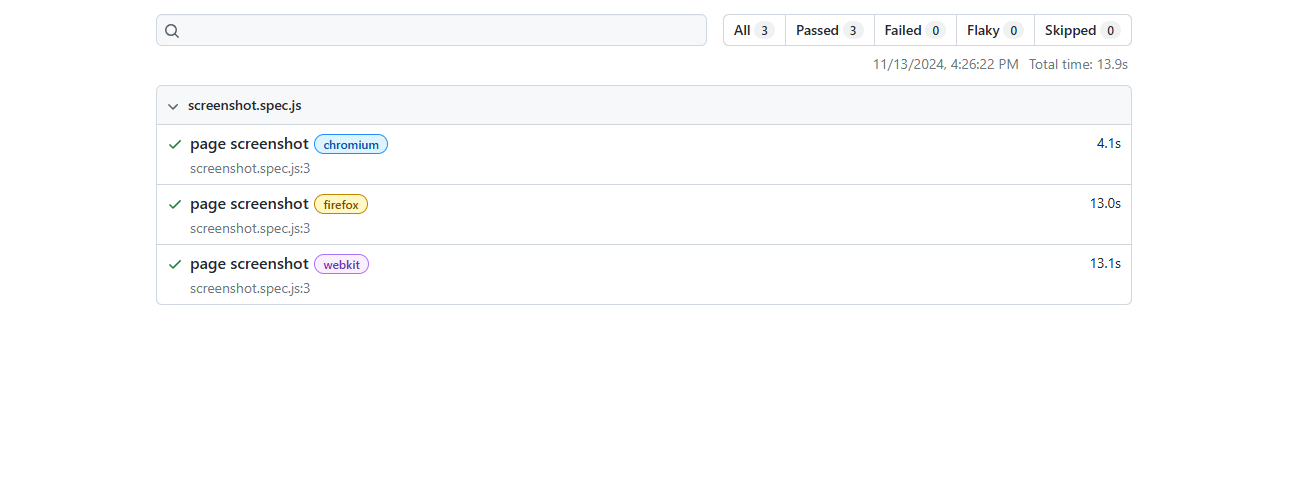
Step 6: Generating HTML Test Reports
After the tests run, an HTML report will be generated, providing detailed insights into test results. You can filter reports by:
- Browser
- Passed tests
- Failed tests
- Skipped tests
- Flaky tests
To view the HTML report, use:
npx playwright show-report