Agenty’s Algolia workflow allows you to automatically crawl your website pages to add them on your Algolia indices to create, re-create or refresh your custom search engine on schedule, or on-demand.
Algolia is a web search product company with SaaS pricing model, they have a track record of fastest and most relevant search engine available in the custom search engine market. If you want to add a search engine on your website or blog, Algolia is the way to go. Algolia is one such on-site search engine that provides more suitable and best search platform for your website
But they don’t crawl your website automatically as Google does to refresh the search engine and auto-index new pages, blog posts or products as soon as they are published on your site publicly.
So the problem with Algolia and almost every custom search tool is: you’d need to manually upload a CSV file, or write your own code to crawl your website pages, or pull content from database > then use Algolia’s open-source library to add those pages to your indices(search index) to make them searchable. That’s the pain!
There comes Agenty to solve that problem! Our Algolia integration allows you to:
- Automatically crawl your website on-demand, on schedule or via API
- Extract fields of choice: Like
title,canonical,html_body,description,crawled_atetc. - Crawl HTML sitemaps, RSS, JSON or XML feeds to make a workflow of steps. For example — Scrape sitemap first with web scraping agent #1 then each page details using agent #2
- Schedule the crawler to run it daily, weekly etc.
- Send the agent result to your Algolia indices to refresh the indices
Prerequisites
- Agenty professional or higher plan to get access of Algolia workflow.
- Algolia account to get your
application_id, andapi_keyto authorize Agenty to connect to your indices
Algolia API Key
- Login to your Algolia account
- Go to Setting > API Keys
- Copy the application id and admin API key
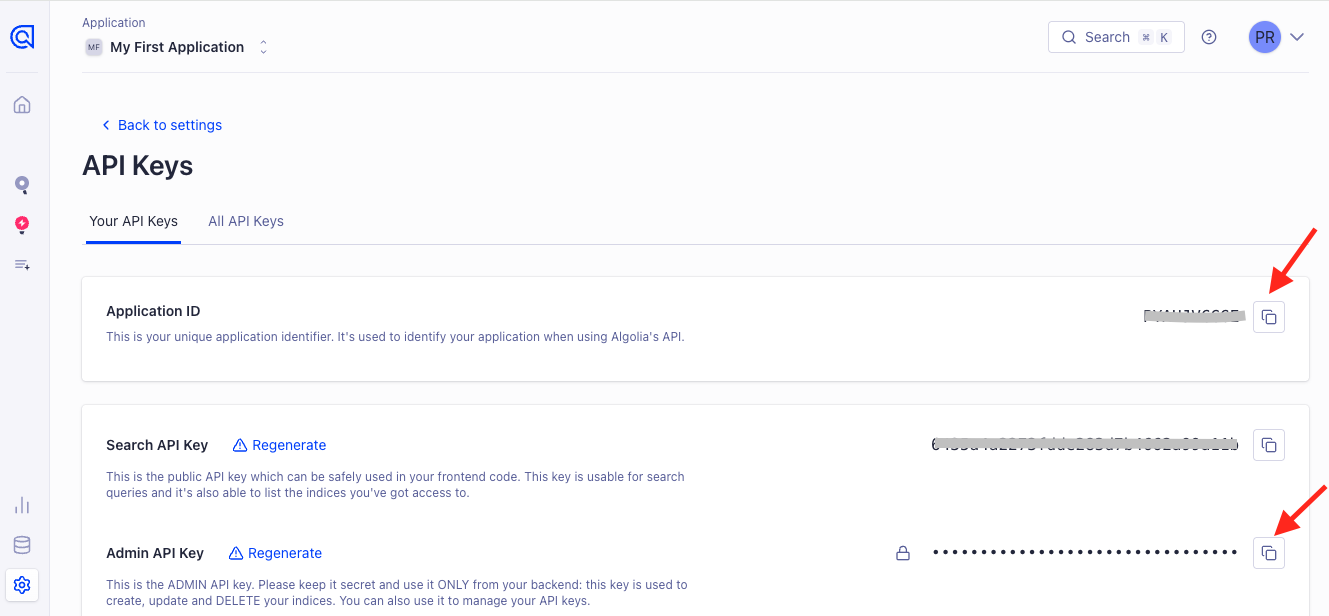
- This application id and API key will be used by Agenty to authenticate and connect to your Algolia account to add, update objects in indices
Setup your web crawler
Setting up a crawler is easy using our Chrome extension available on chrome store. You can just go to the website page you want to scrape and add the field of your choice by clicking on the elements to generate selector or write manually if you know how CSS selector works. See this detailed article to learn how to create a scraping agent or video tutorial here.
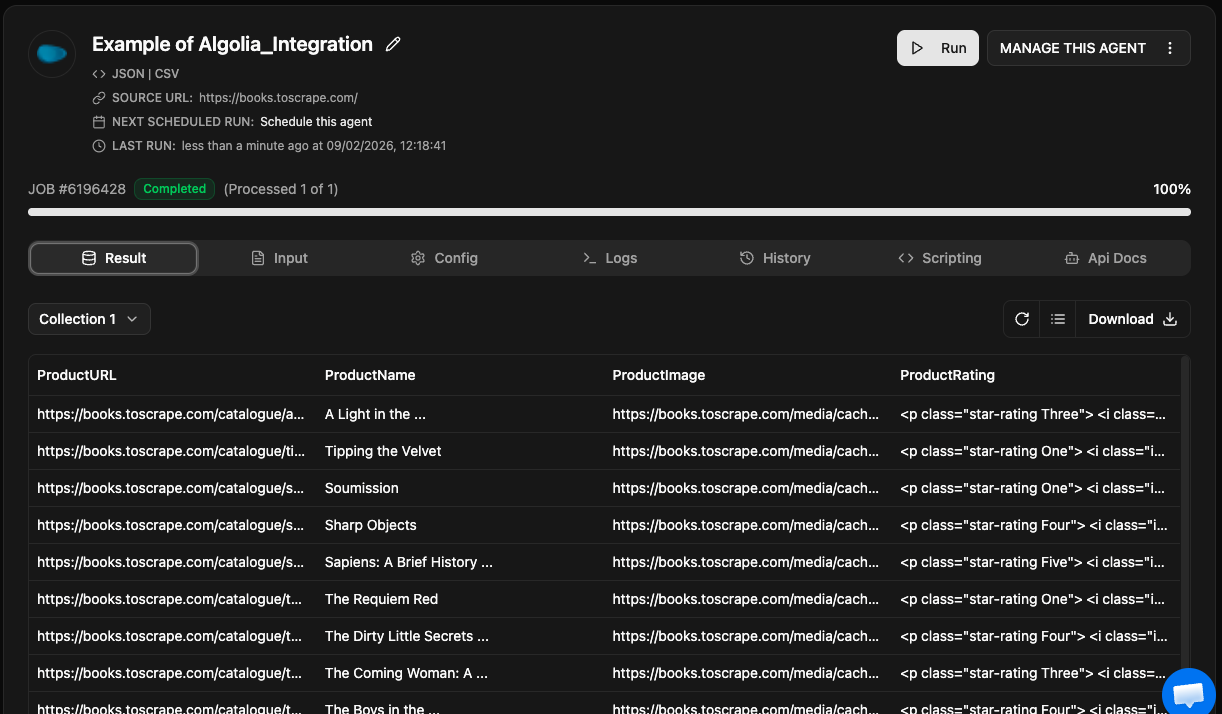
So, in this example I have created a scraping agent with a URL field to crawl
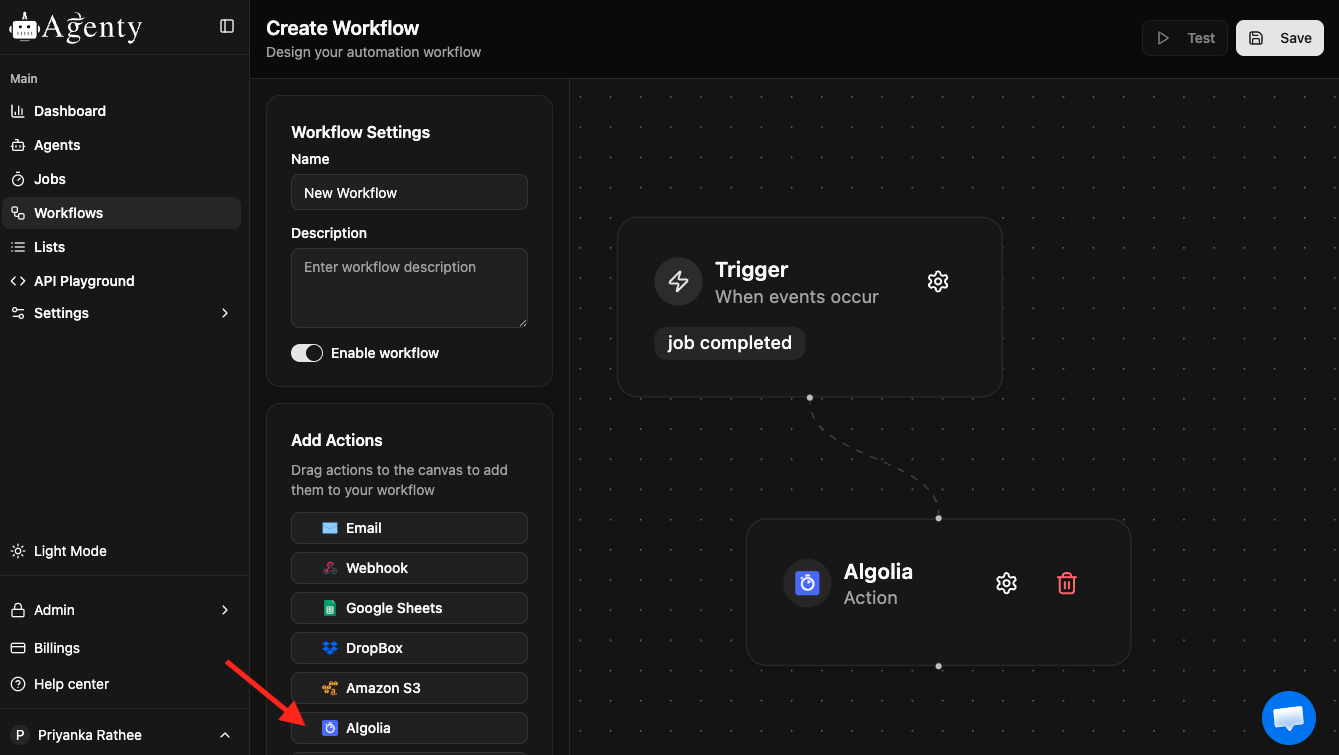
Configure Algolia Workflow
- Go to Agenty workflow tab
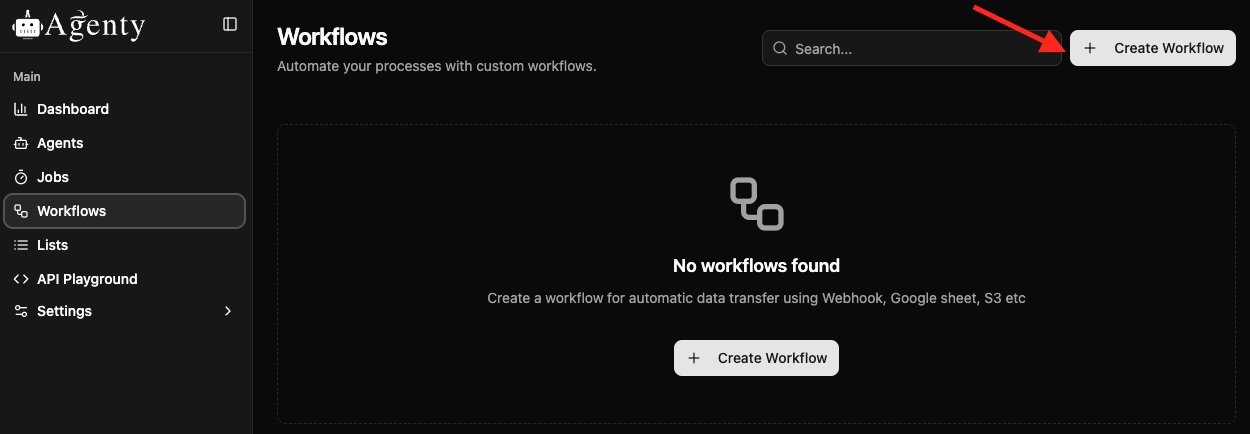
- Drag the Algolia workflow
-
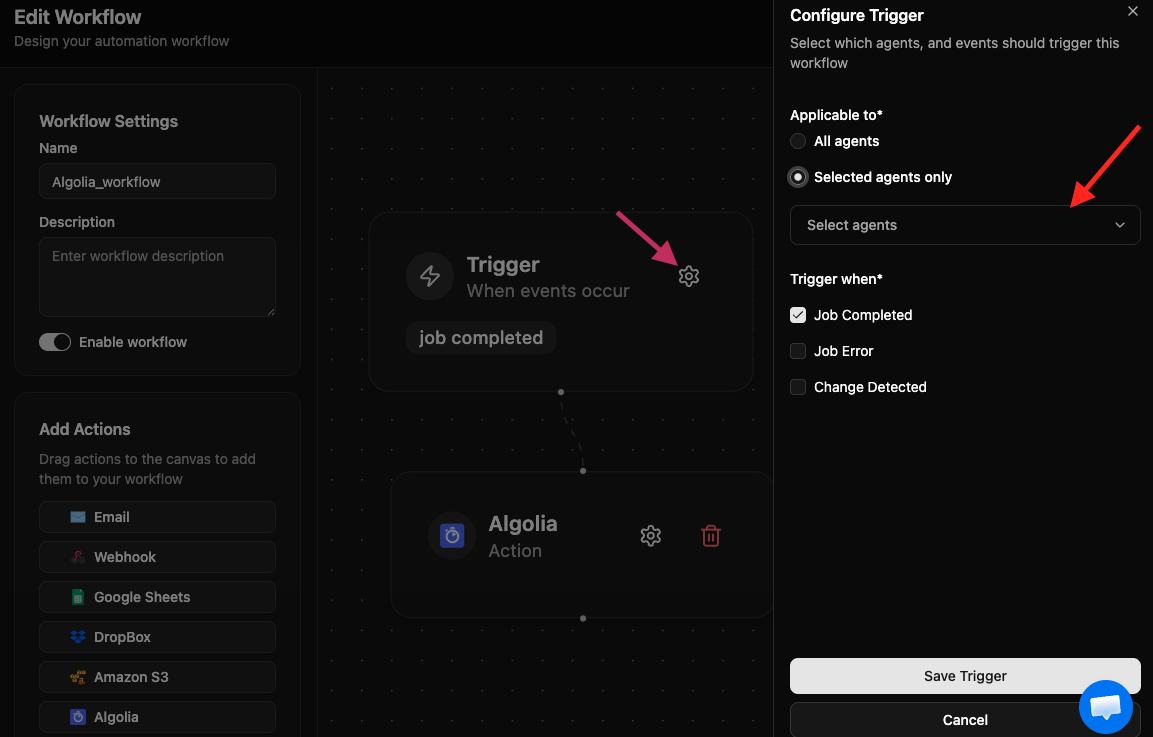
Click on the Trigger setting icon
-
The workflow page will open, where we need to select the particular agent and when you want to trigger(after Job_completed, Job _Error or Change_detected ) > save Trigger.
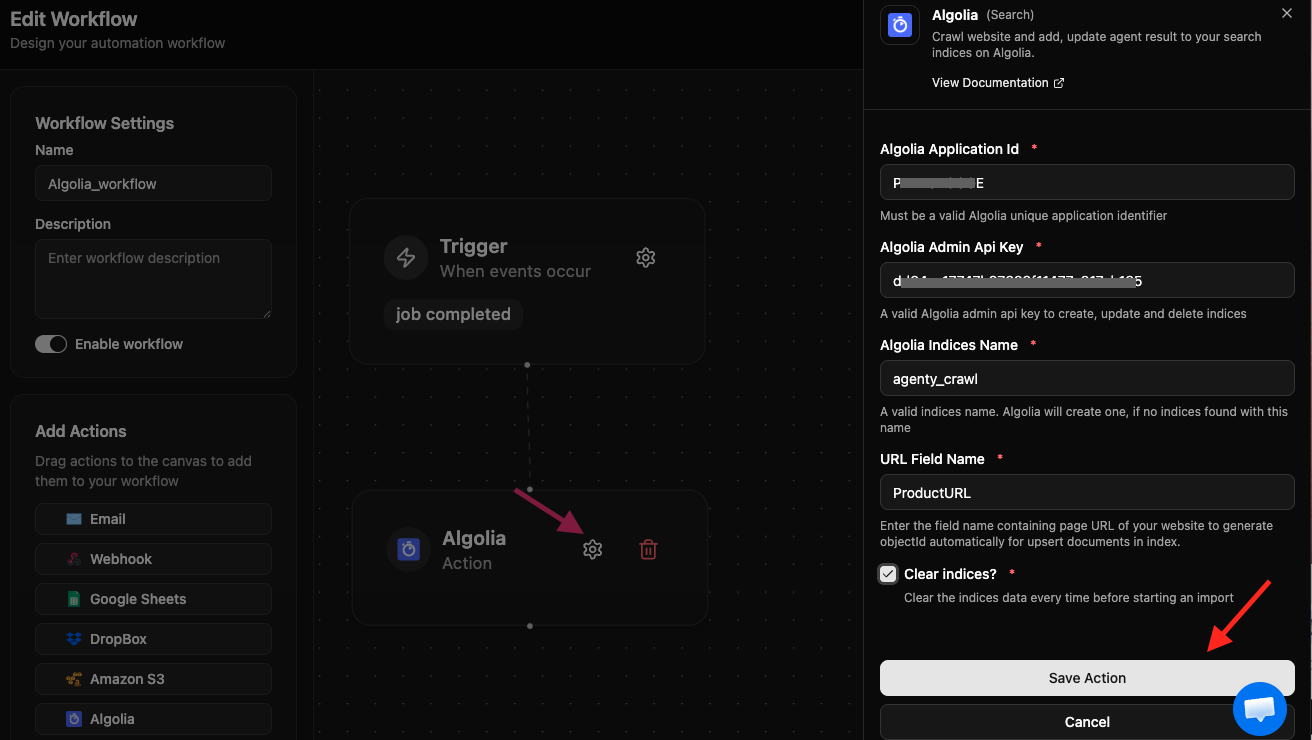
- Now edit Algolia by clicking on its setting icon
- And enter the application id, api key, URL field name and Algolia indices name where the crawling job result will be sent to
- Click on the save action to attach this workflow to your agent
The integration will fire on job completion event. For example, if you are crawling > 5,000 pages from your website. The plugin will start the execution when all 5,000 pages crawling has been completed.
Start your web crawler
Once the web crawling agent has been created; plugin has been attached; Now we are ready to start our web crawling job.
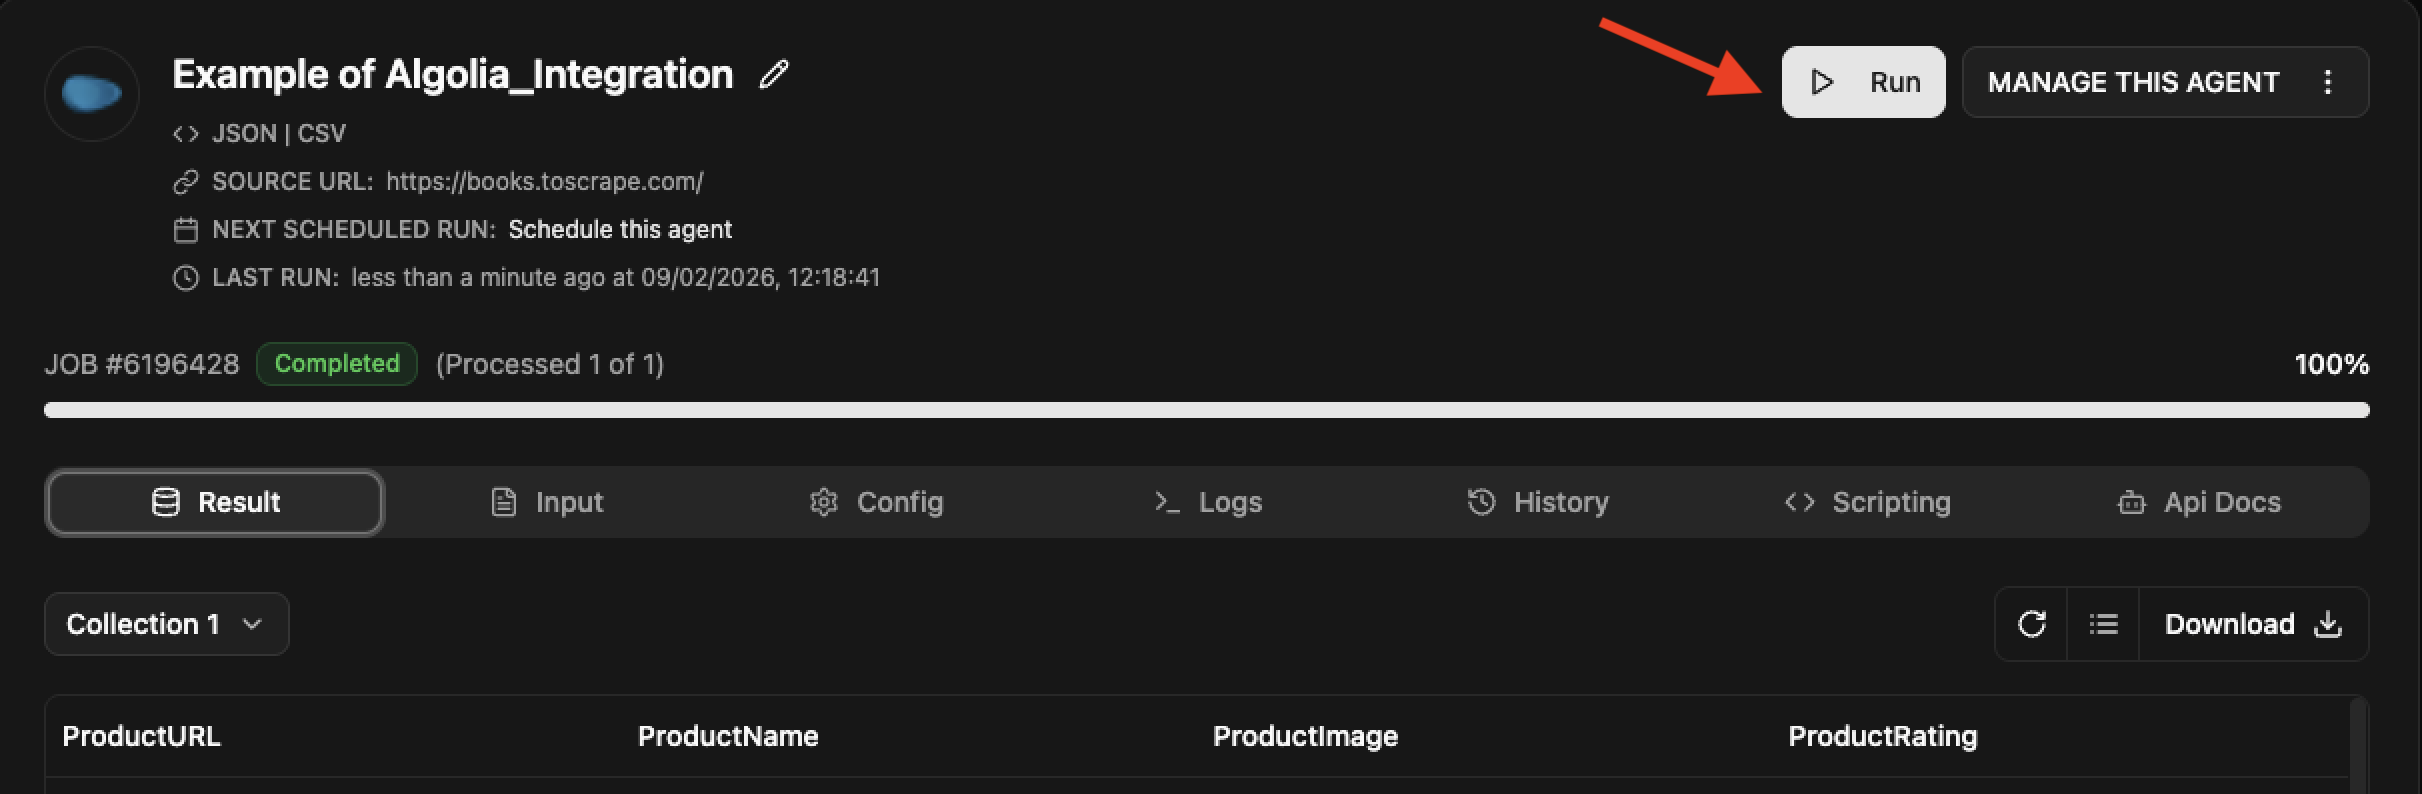
When the job complete, see logs :

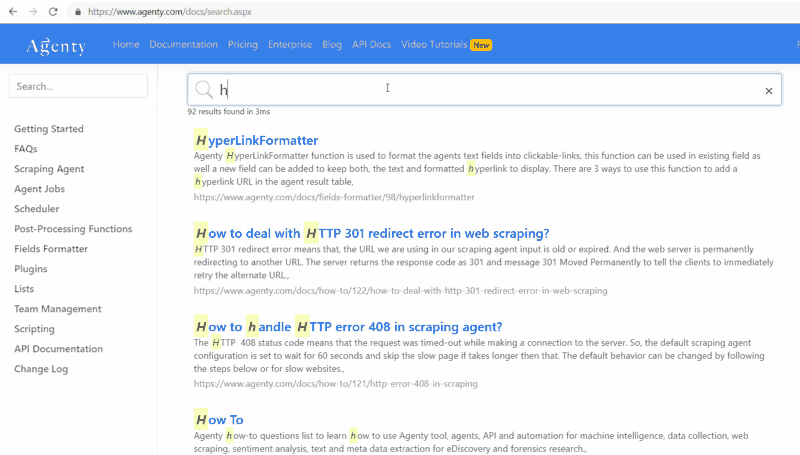
Preview Algolia Custom Search Engine
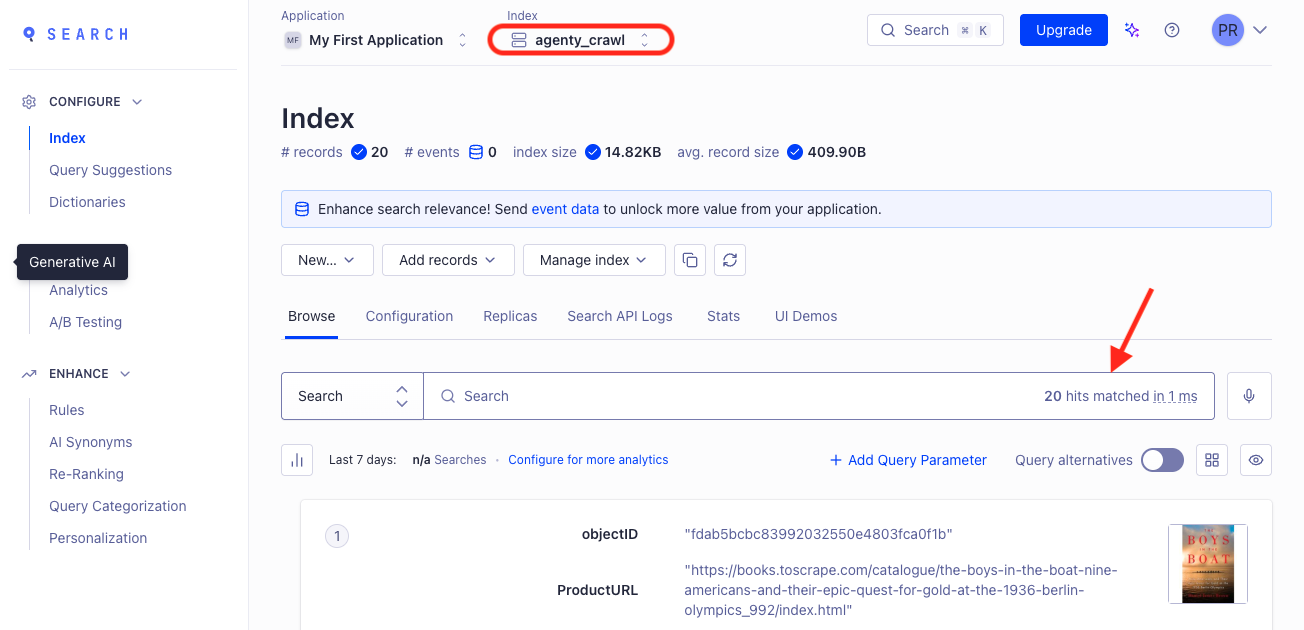
- Now, the search index is ready. We can integrate Algolia in the website or can use their built-in UI as well for searching.
- Go back to your Algolia account > Data Source
- Go to Indices page and you’ll find your indices have been created, re-created or refreshed with the data sent from Agenty.
- Now, you can generate the UI demo or can use their open-source library in almost every language to add the search feature to your website. For example, we are using instant-search JavaScript library to add the search engine to our website.
- Include the main instantsearch.js library
<script src="https://cdn.jsdelivr.net/npm/algoliasearch@3.32.0"></script>
<script src="https://cdn.jsdelivr.net/npm/instantsearch.js"></script>
- Modify this code with your_application_id and your_api_key or other optional variable if needed.
// 1. Instantiate the search
const search = instantsearch({
  indexName: 'Agenty-Search-Index',
  searchClient: algoliasearch('your_app_id', 'your_api_key'),
});

// 2. Create an interactive search box
search.addWidget(
  instantsearch.widgets.searchBox({
    container: '#searchbox',
    placeholder: 'Search...',
  })
);

// 3. Plug the search results into the product container
search.addWidget(
  instantsearch.widgets.hits({
    container: '#searchResult',
    templates: {
      item: '{{#helpers.highlight}}{ "attribute": "title" }{{/helpers.highlight}}',
    },
  })
);

// 4. Start the search!
search.start();
- Publish your website on server or test on localhost