Zapier is a wonderful workflow tool lets you connect 1000+ apps to automate many workflows between applications. This tutorial explains how to send Agenty data to Zapier.
In short, our Zapier workflow allows you to say “If X job completed in Agenty, then Y happens in another app”
With this integration, you can connect Agenty with 1000+ applications!
Create a Zap
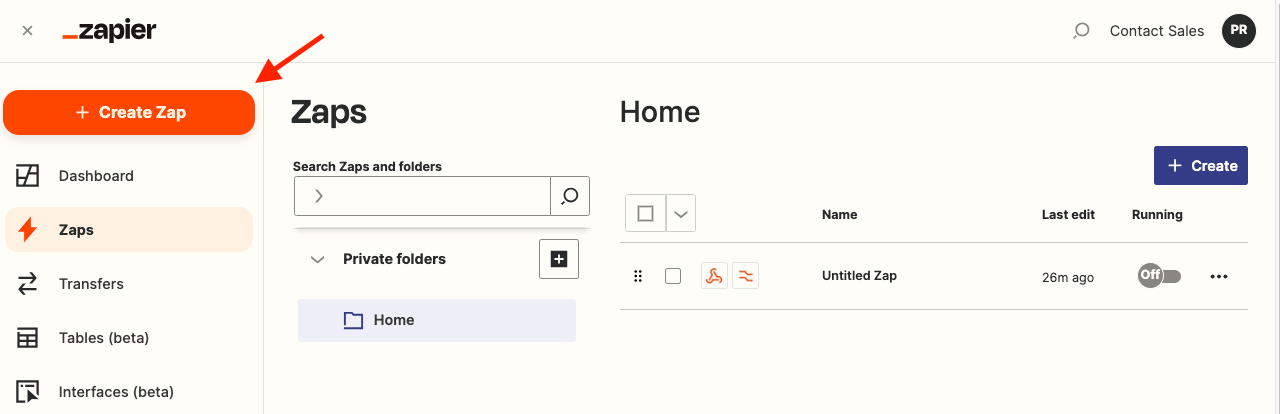
Step 1 First, Go to Zapier website and signup or login your account. Then click on the Create Zap!.
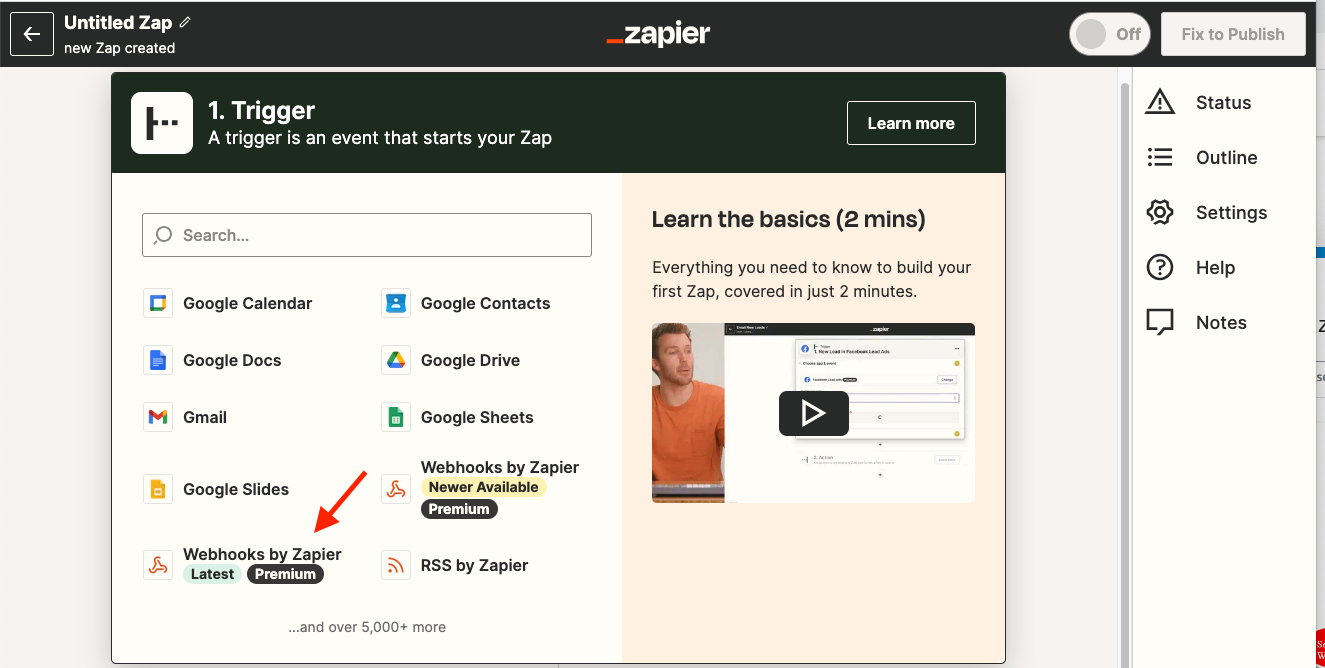
Step 2 Select Webhooks by Zapier. And you can also give it a name.
Step 3 On Event, select Catch Hook. The catch hook(or webhook) is like a data receiver and can read any data sent via a HTTP POST method in request body.
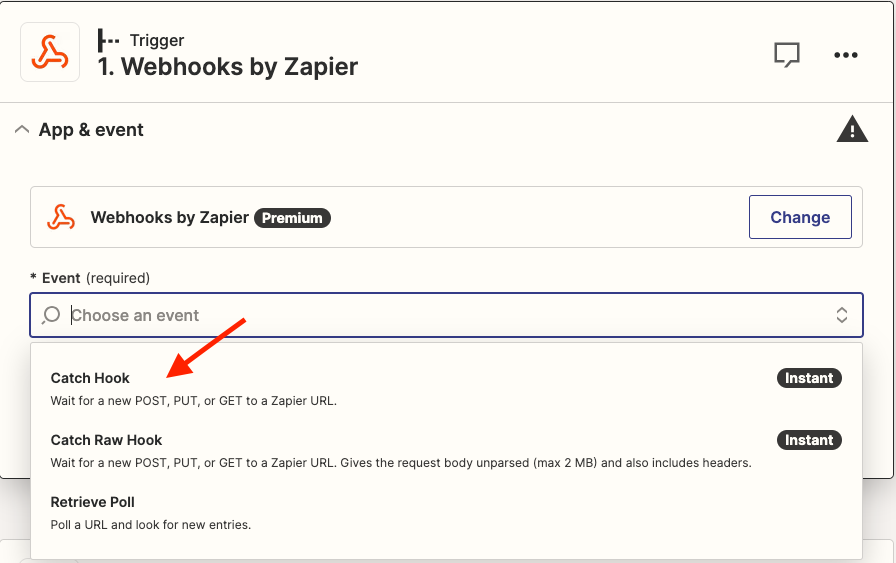
Click on the button Continue.
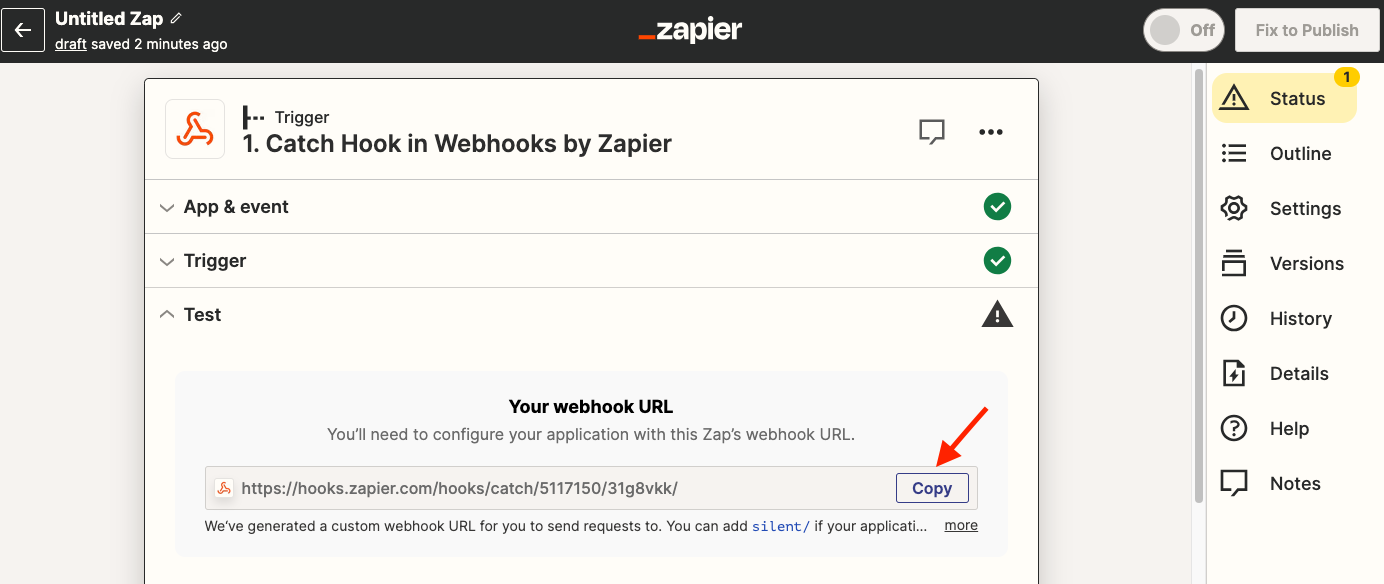
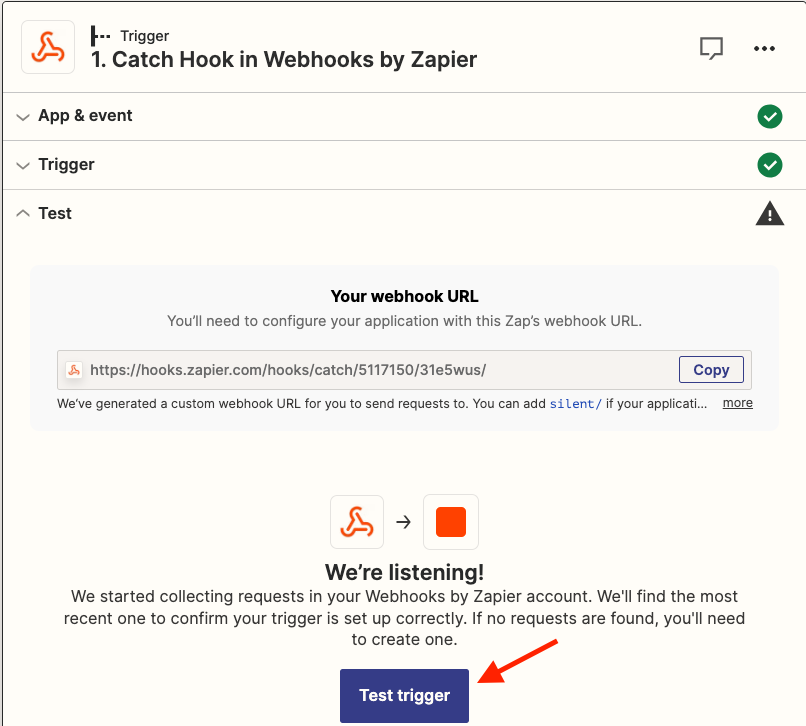
Step 4 Once you hit the save button, Zapier will create a custom webhook URL for your zap. Copy this URL to use in Agenty.
How to Add Zapier Workflow in Agenty
Once you have the webhook URL, login to your Agenty account.
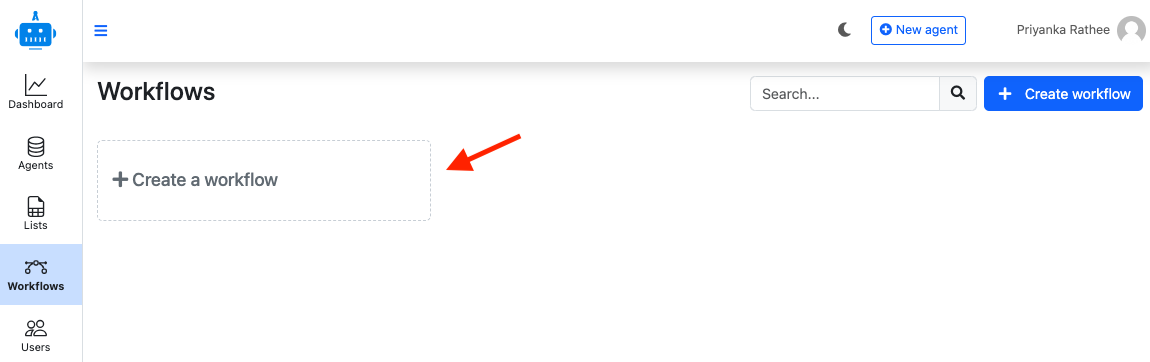
Step 1 Go to the Workflow page and create a workflow
Step 2 Now select the Zapier Workflow as in screenshot below.
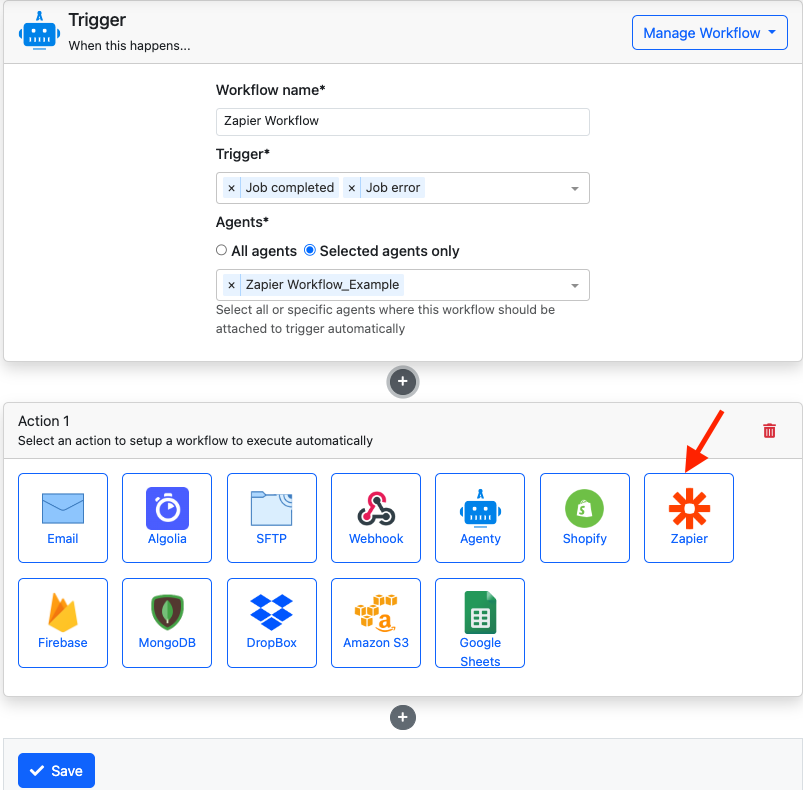
Step 3 Add workflow name > Select Triggers
Step 4 Select your agent where you want to add this workflow from dropdown
Step 5 Paste the Zapier webhook URL in the URL Endpoint box.
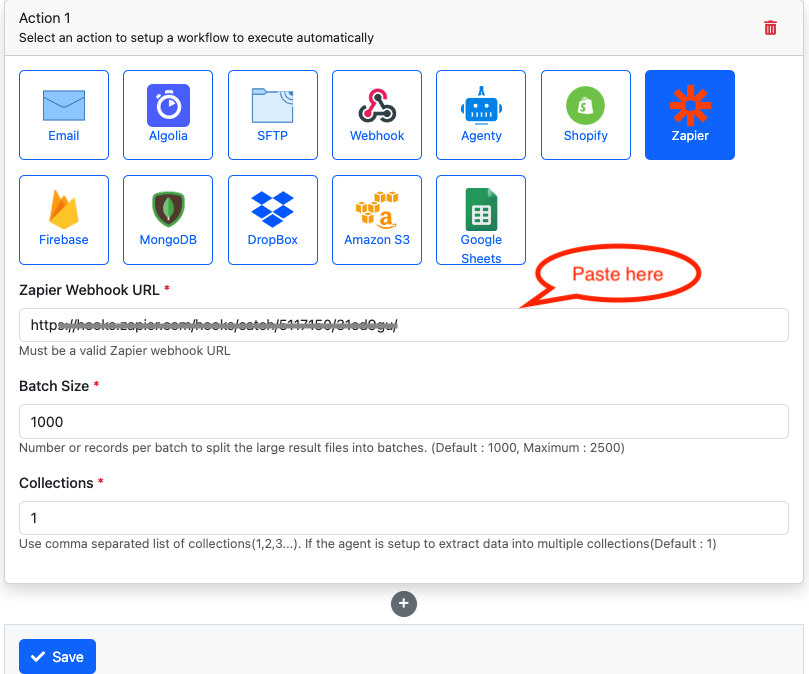
Step 6 Add the Batch Size and Collection you have in your agent. Save it
Testing and Preview
Step 1 Now go to the Agents page and re-run your agent
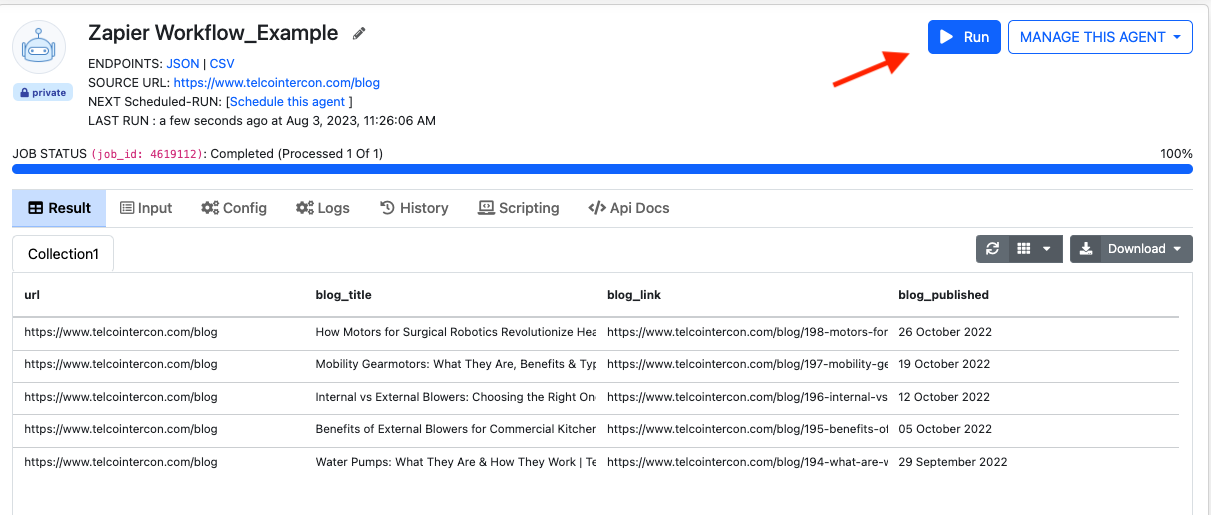
You can see the logs agent result has been transferred on Zapier:

Agenty will trigger this workflow after a job has been completed for selected agent. So make sure you run your agent once to send the result to Zapier webhook for testing.
Step 2 Return to your Zapier dashboard and click on the Test trigger button.
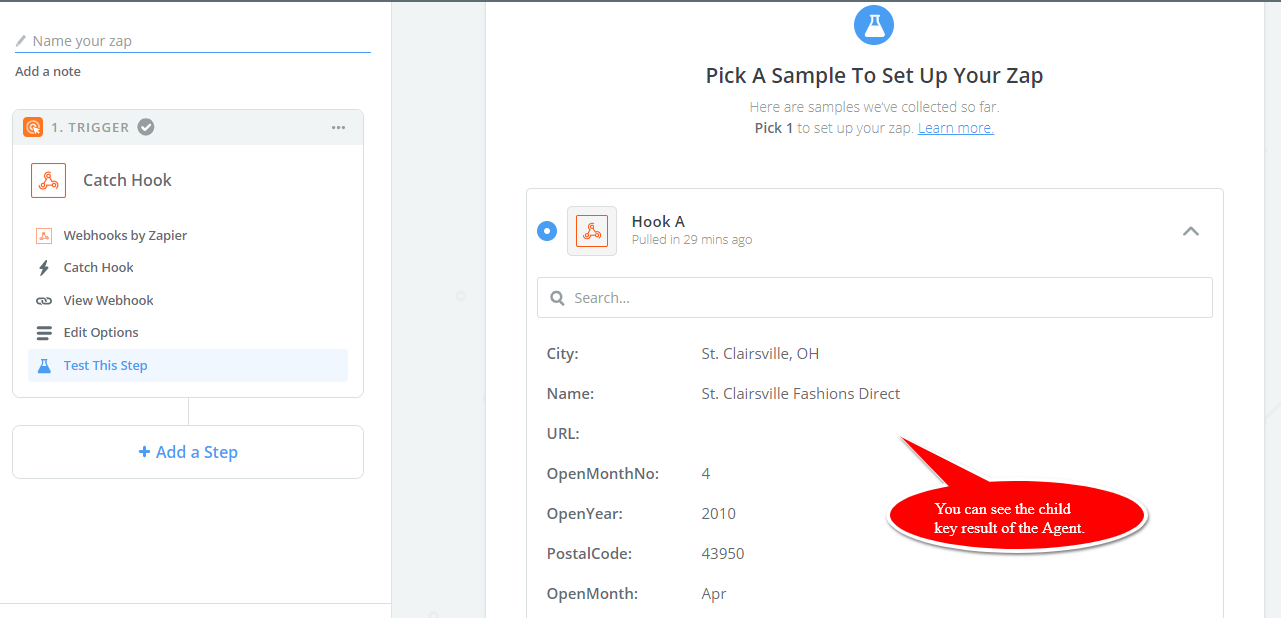
Step 3 Zapier will catch few records and show as in this screenshot.
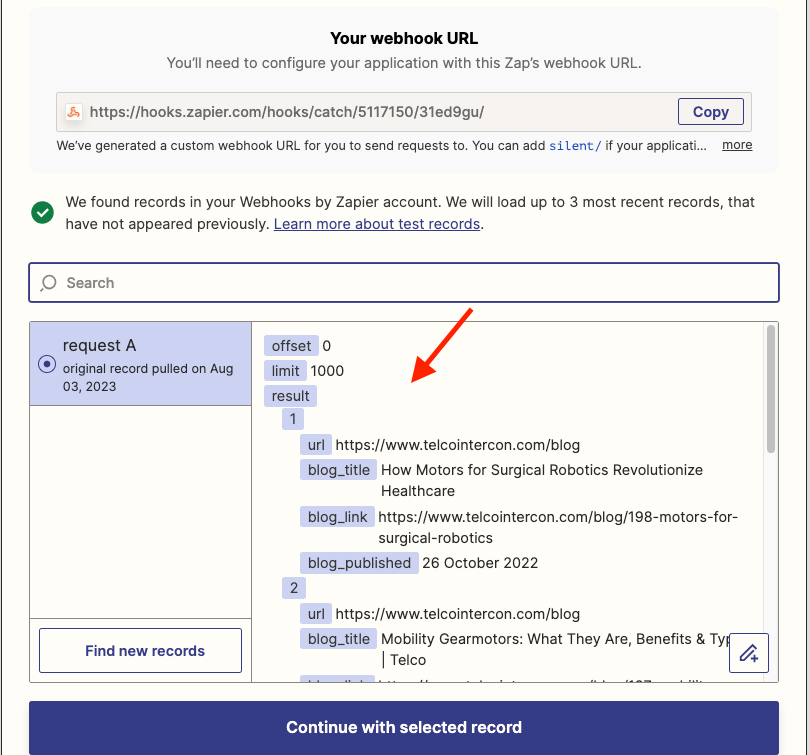
Step 4 Agenty always push the agents result in a result[] objects array. So we can tell Zapier to look for the result key by clicking on the edit option and then write result in the text box as in this screenshot:
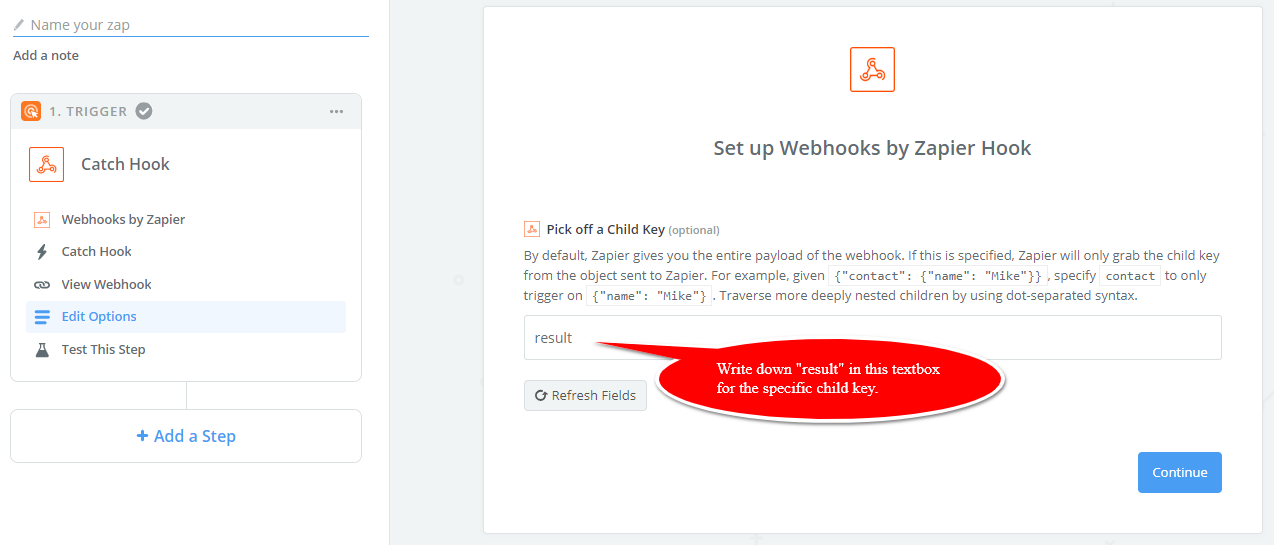
Step 4 Click on the Continue button, and you will see Zapier will read the objects array correctly in key-value format to fill up spreadsheet or anywhere else as per the action selected.