Webhook allows you to automatically import the agents data into your application, whenever the fresh data becomes available. This tutorial explains how to send Agenty data to Webhook URL endpoints.
In short, our Webhook workflow allows you to say “If X job completed in Agenty, then send the job result to my app”
With this workflow you can import the Agenty data into your databases!
Webhook Endpoint
The first step is to create a URL endpoint in your application, which will accept the HTTP POST request sent by Agenty. In this tutorial, I will use https://webhook.site/ to create a sample URL endpoint to inspect, preview and demonstration.
-
Go to https://webhook.site/
-
Here, URL endpoint will generate automatically
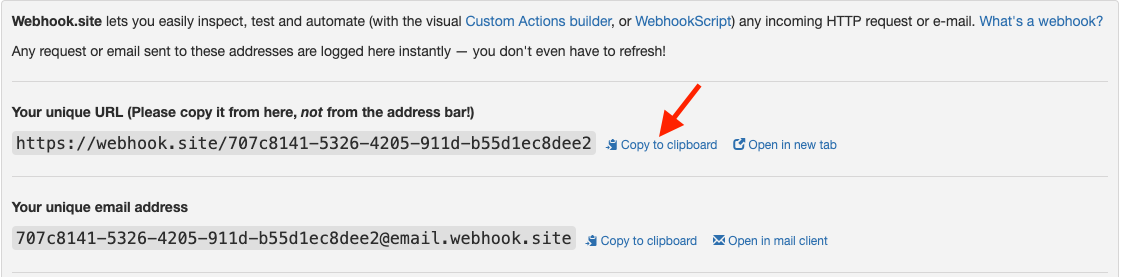
- Copy the endpoint URL
Add Webhook Workflow
-
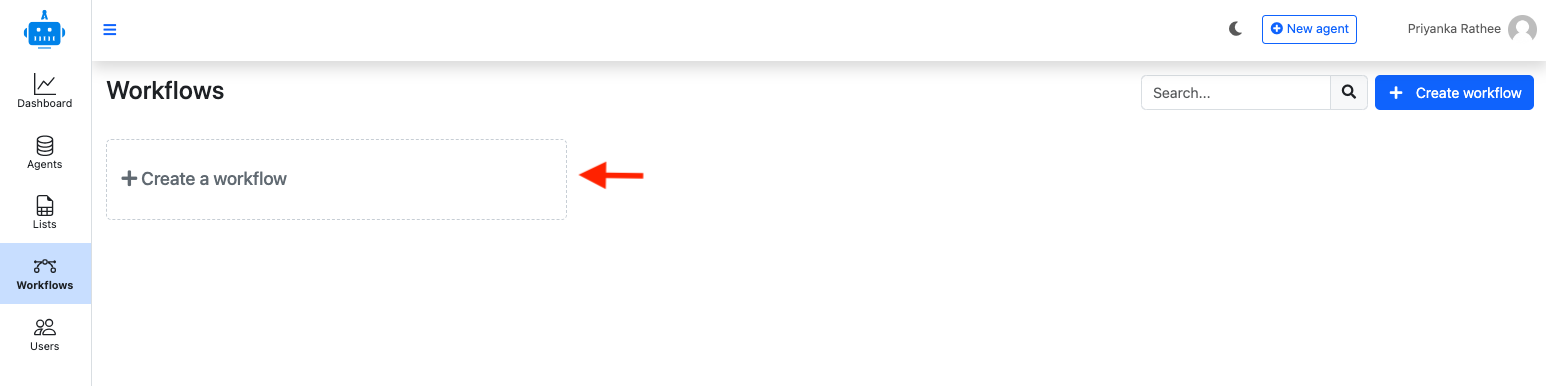
Click on the Workflow tab
-
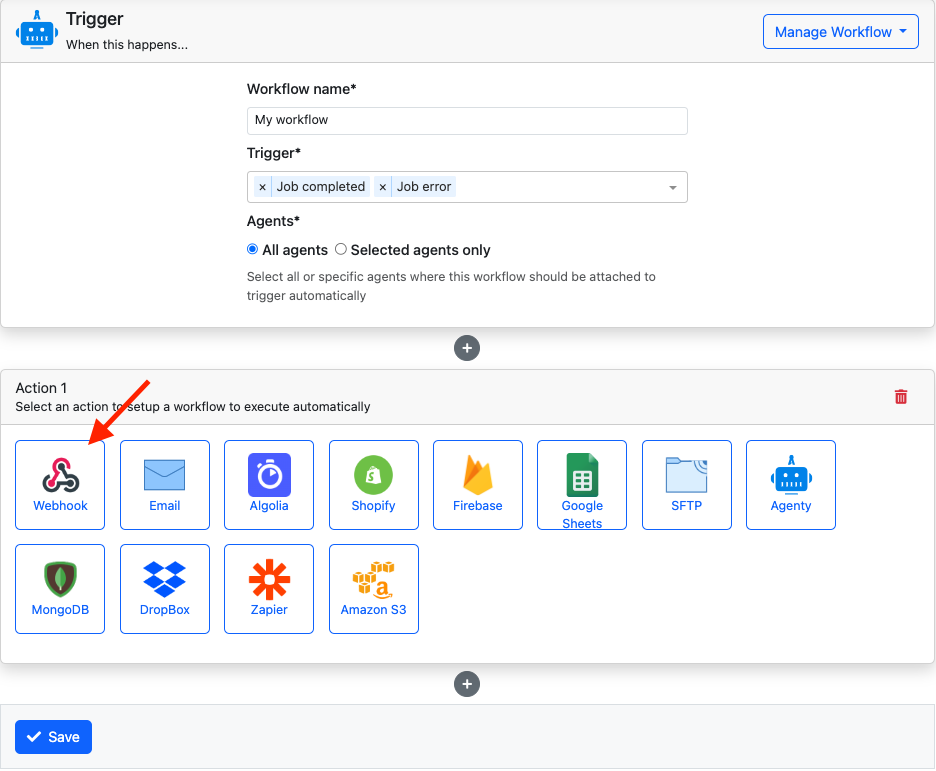
Select the Webhook Integration as in this screenshot
Now go on with 2 simple steps:
Step 1
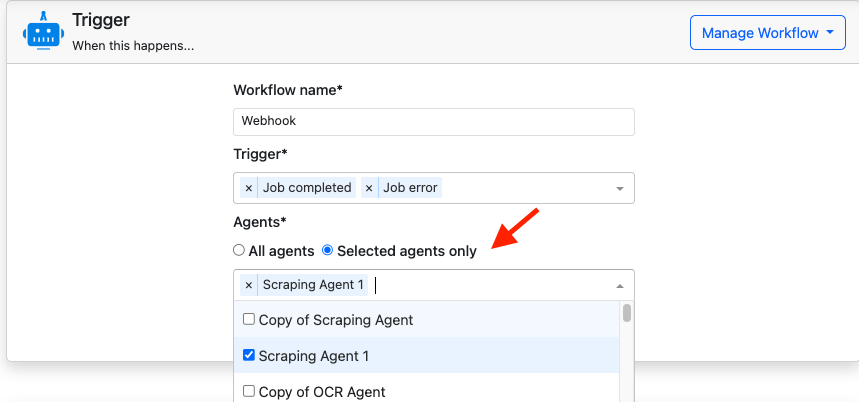
- Add workflow name.
- Select trigger type
- Select one, multiple or all agents where this workflow added.
Step 2
-
Then, a model will open on the right to enter parameter details for this webhook
-
Enter your parameter details such as webhook URL in the URL endpoint box, batch size etc…
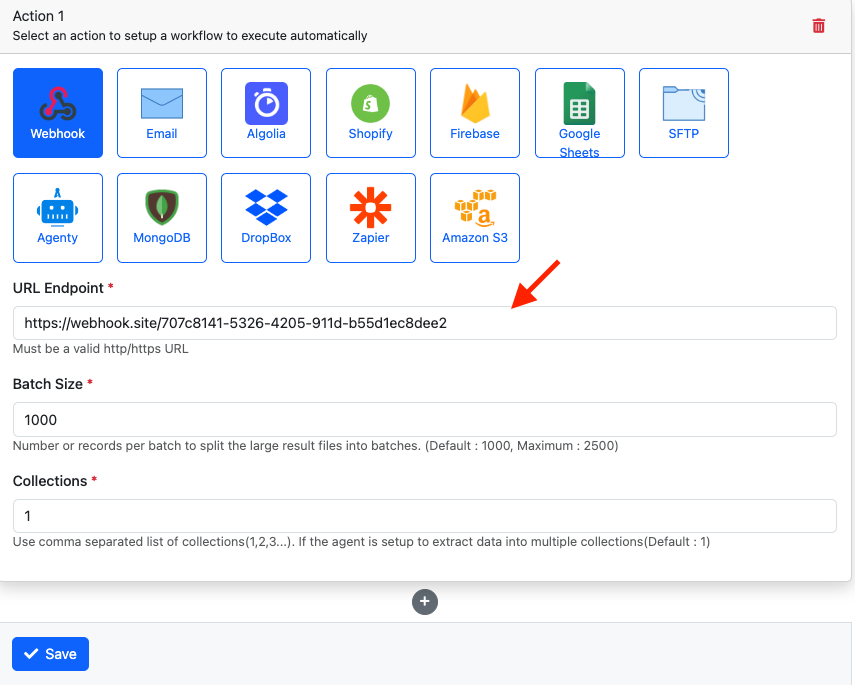
- And save it.
Parameters
-
Agent: Your agent where this integration will be attached to trigger automatically on job completion. -
Name of your integration: A name will help to identify this integration, when multiple plugins of the same type are used in any agent. -
URL Endpoint: A valid http or https URL to send a HTTP POST request with data -
Batch size: Number or records per batch to send, this option will help Agenty to split the large result files into smaller batches. (Default : 1000,Maximum : 2500)
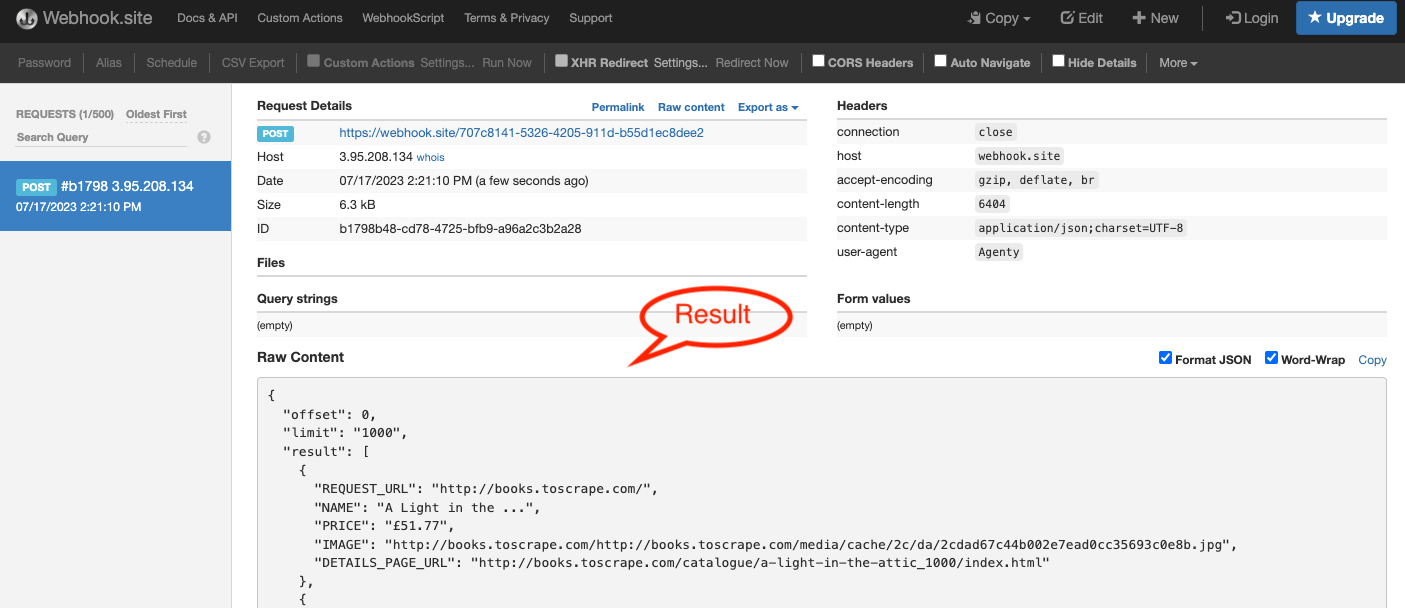
Testing and Preview
-
Re-run your web scraping agent to fire the webhook workflow
-
Agenty will send a HTTP POST request with the agent results in the body, on a job completion event.
-
Check your URL endpoint when the agent job has been completed